Lubricating hinges, pedals and locks
The Video Course teaches you everything about modern cars.
At regular service intervals clean and lubricate hinges on moving panels and foot-pedal pivot points. Check the accelerator cable for stiffness.
Door hinges should be checked more often than boot and bonnet hinges they take more weight and get more use.
Oil metal-to-metal parts on door locks, and keep keyholes clean.
Oiling foot pedals
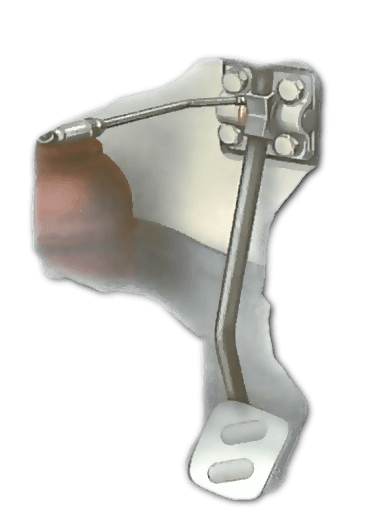
Most brake and clutch pedals have a pendant action, and the pivoting parts will be above them, behind the dashboard . Use a torch to see them if necessary.
Pedals with nylon bushes do not need oiling. Pedals that swing on a steel rod need a regular injection of engine oil at pivots and on rubbing surfaces.
Place old newspaper under the pedals to catch drips, and clean off any surplus with a cloth. Wipe off oil that drips on to pedal rubbers with methylated spirit on a cloth.
Most accelerators have pendant pedals. Locate the pivot point - it is probably under the dashboard or beneath the bonnet. Lubricate metal-to-metal points with clean engine oil.
Some cars have accelerator pedals pivoted at the floor. Lift the carpet to avoid marking it, then lubricate the metal hinge with clean engine oil. If a floor-pivoted pedal is fixed to a shaft that operates through a metal tube, lubricate the inside of the tube.
Another type of accelerator pedal is called an organ pedal. It is hinged to the floor, and the pedal operates a normal pendant linkage . Lubricate the metal-to-metal links.
Rubber hinges do not need maintenance. Pedals bearing on a roller or pad do not need oiling, but keep them free from dust and fluff.
Oiling hinges and restrainers
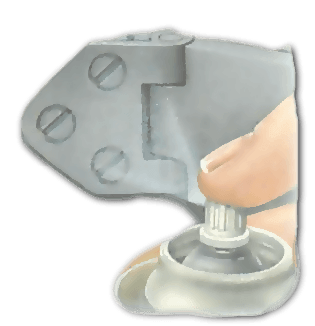
On door hinges lubricate friction surfaces and hinge pins with clean engine oil, wiping away any residue with a cloth.
Most car hinges have hollow, rolled-steel hinge pins with plastic caps top and bottom. Prise off the upper cap with a screwdriver and fill the pin with heavy gear oil - rear axle oil is ideal. Replace the cap, and wipe the hinge clean.
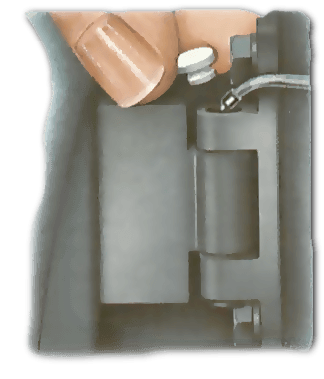
THinges that are not hollow and do not have plastic caps can be sprayed with penetrating lubricant from an aerosol can if the hinge has stiffened. Once the action has eased, lubricate the hinge regularly with clean engine oil.
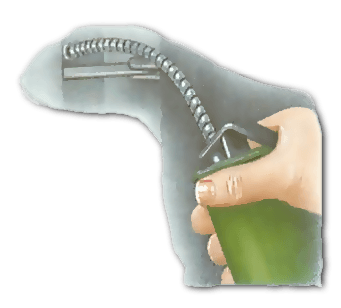
The door restrainer, or check strap, is designed to prevent the door being opened too far, which damages the hinges so that the door no longer closes properly.
Some door restrainers include a mechanism for spring pressure against a peg, to keep the door open and prevent the wind from closing it when people are getting in and out. A little clean engine oil will prevent the action of the restrainer from becoming rough and noisy.
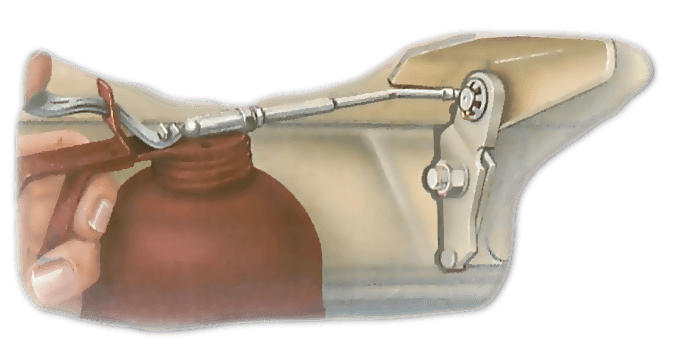
Check the free movement of boot and bonnet hinges by opening and closing them. Most need only occasional lubrication.
When necessary, apply engine oil to pivot pins and wipe off any surplus.
Before oiling boot hinges, line the boot with old newspaper to catch any drips. Before removing the newspaper, check hinges and pins for tightness and boot and bonnet panels for alignment.
If adjustments are necessary, see Adjusting catches and hinges .
Rear-hinging bonnets usually have a dovetail bolt which locks at the front to a circular striker plate . If the dovetail is stiff, lubricate with engine oil. Smear petroleum jelly on the striker, where the dovetail lock makes contact.
Front-hinged bonnets usually have a pin-and-striker locking mechanism fitted to the bulkhead. Smear petroleum jelly over metal-to-metal parts.
Changing pedal pads
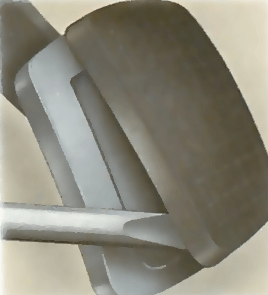
Peel off old rubber pads and clean the pedal and its stem with a cloth moistened with methylated spirit.
Wet new pads if they are hard to fit . If necessary, use a small-bladed screwdriver as a lever to ease the rubber into place.
Some pads are held by a metal clip. Fit a new clip, bending the fixing pads over the pedals.
Freeing a sticky accelerator cable
If your car has a cable-operated accelerator and the action becomes sticky, the inner cable may have broken strands, which are snagging the outer casing. Loosen the cable at the carburettor , end, detach it from the pedal end, and withdraw it.
Renew a damaged cable as soon as possible. As a temporary measure, unravel broken strands and nip them off with pliers.
Thread a new inner cable from the pedal end. Connect and tighten at the carburettor end, then at the pedal end. Check that it operates correctly at full throttle and the engine idles correctly. If it does not, adjust it, usually at the carburettor end. If the inner cable is stiff but undamaged, inject engine oil into the casing before reassembly.
Place the Outer cable vertically in a vice, gripping it lightly. Mould a Plasticine funnel at the top.
Fill the mould with clean oil and allow it time to seep into the cable assembly - overnight if possible. Do not oil cables with nylon inserts.
Lubricating locks
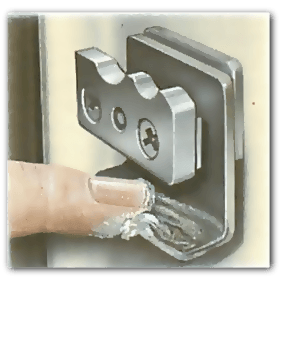
Smear petroleum jelly on to the parts of the striker assembly where there is metal-to-metal contact. Wipe off surplus.
Nylon striker assemblies must not be oiled. Treat them with a silicone lubricant.
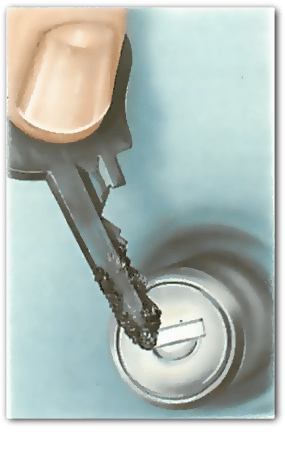
Do not use greasy lubricants on keyholes. Such lubricants attract dust and fluff which can hamper the movement of the tumblers.
The Ultimate Car Mechanics video course
Learn everything about modern cars from our new video series.
Learn more >-
We build a Mazda MX5 Miata from scratch
We start by tearing down and then rebuilding the whole car.
-
Every part explained
There's ridiculous detail on every part. Clearly and easily explained.
-
All modeled in 3D
We've created the most detailed 3D model ever produced so we can show you everything working.


